
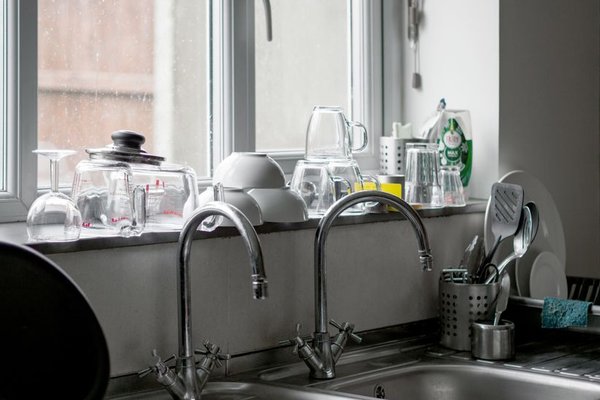
Replacing a kitchen faucet looks harder than it usually is because most of the work happens inside a cramped cabinet. The basic process is simple: shut off the water, remove the old faucet, clean the mounting area, secure the new fixture, reconnect the faucet supply lines, and test for leaks. Access and stubborn old hardware are often the biggest challenges.
Before starting, read the installation sheet supplied with your faucet. Mounting systems, gaskets, hose connections, and supply fittings vary by model. Following those instructions is especially important for sealing the faucet base and tightening connections correctly.
What You Need Before Starting
Gather an adjustable wrench, basin wrench or faucet tool, bucket, towels, flashlight, screwdriver, and a plastic putty knife. You may also need penetrating oil for corroded mounting nuts or an adapter if the new supply lines do not match your shutoff valves. Do not automatically use plumber’s putty or thread-seal tape; many faucets use a supplied gasket, and common compression connections usually seal without tape.
Empty the sink cabinet and place a towel and bucket below the valves. Inspect the shutoff valves before beginning. If a valve is badly corroded, will not close, or starts leaking from its stem, address that issue before continuing with the sink faucet replacement.
How to Remove the Old Faucet
Step 1: Shut Off the Water
Close the hot and cold shutoff valves beneath the sink, then open the faucet to relieve pressure and confirm the water has stopped. If water continues to flow steadily, the valves may not be sealing properly and the home’s main water supply may need to be turned off.
Step 2: Disconnect the Supply Lines
Place the bucket under the connections and loosen the hot and cold supply-line nuts at the shutoff valves. Some water will usually drain out. A basin wrench helps when access is tight. If the cabinet contains a sprayer hose, filter, or other plumbing, take a quick photo before disconnecting anything so reassembly is easier.
Step 3: Remove the Mounting Hardware
Find the mounting nut, bracket, or plate that holds the faucet to the sink or countertop. Loosen it while supporting the faucet if needed. For corroded hardware, penetrating oil and patience are safer than forcing a wrench against a thin sink.
Lift out the old faucet, then remove old putty, sealant, mineral deposits, and grime from the mounting surface. A clean, flat surface helps the new faucet sit straight and remain secure.
Install the New Kitchen Faucet
Step 4: Position and Secure the Faucet
Install the supplied gasket, deck plate, or trim ring as directed. Feed the faucet hoses and shank through the sink opening. Center the faucet and check that the handle has enough clearance before tightening from below.
Fit the washer, bracket, and mounting nut underneath the sink. Hand-tighten first, then finish with the recommended tool. The faucet should feel solid without being overtightened. Excessive force can distort mounting hardware or damage some sink materials.
A useful real-world check is to hold the faucet base while gently moving the spout. If the entire fixture shifts, tighten the mounting system slightly while someone keeps the faucet aligned from above.
Step 5: Connect the Faucet Supply Lines
Connect the hot line to the hot shutoff valve and the cold line to the cold valve. Start each fitting by hand so the threads engage cleanly. Many modern faucets use 3/8-inch compression connections at the valves, but sizes vary. Use the correct adapter if needed rather than forcing incompatible fittings.
If integrated lines are longer than necessary, route them in a broad loop without kinking them. Tighten according to the manufacturer’s instructions. Overtightening can damage washers, flexible lines, compression fittings, or valves.
Step 6: Connect the Sprayer Hose
For a pull-down or side-spray faucet, attach the hose using the supplied quick connector or threaded fitting. Make sure quick-connect fittings are fully seated. Position the hose weight as directed and check that the hose moves freely without catching on the drain, valves, or stored items.
Turn the Water Back On and Check for Leaks
Open the faucet handle, then slowly reopen both shutoff valves. Watch the connections as the lines pressurize. Run the faucet to flush debris from the installation; some manufacturers recommend removing or protecting the aerator during this step, so follow the model instructions.
Dry every connection and inspect it again after several minutes. Pressing a dry paper towel around each fitting makes small leaks easy to spot. If you find a drip, shut off the water before adjusting the connection. Tighten only as much as necessary, retest, and check again later in the day for a slow leak.
Common Kitchen Faucet Installation Mistakes
Common mistakes include cross-threading supply fittings, kinking flexible lines, leaving debris under the faucet base, and overtightening connections. Another is using sealant everywhere. The correct sealing method depends on the design: some faucet bases use a gasket, some call for plumber’s putty or silicone, and compression fittings seal at their mating surfaces rather than by covering the threads with tape.
This job also creates a good opportunity to inspect nearby components. If you are planning related work, guides on upgrading a kitchen sink, fixing a dripping faucet, and basic plumbing DIY maintenance are natural next steps.
Frequently Asked Questions
How long does it take to replace a kitchen faucet?
A straightforward replacement with accessible valves often takes about one to two hours. Corrosion, tight cabinet space, incompatible fittings, or difficult mounting hardware can add time.
Can I replace a kitchen faucet without a plumber?
Many homeowners can handle the job with basic tools when the shutoff valves work and the existing plumbing is in good condition. Call a plumber if valves will not shut off, pipes are damaged, fittings are severely corroded, or the connection layout is unfamiliar.
Do I need plumber’s putty under a kitchen faucet?
Not always. Many new faucets include a gasket that provides the required seal. Use plumber’s putty or silicone only when the manufacturer specifies it and the product is suitable for the sink or countertop material.
Why is my new faucet leaking under the sink?
Typical causes include a loose supply connection, a quick connector that is not fully seated, a damaged washer, or a cross-threaded fitting. Dry the area, identify the exact source, shut off the water, and correct that connection instead of tightening everything.
Finish With a Final Check
A successful kitchen faucet installation should feel solid, operate smoothly, deliver normal hot and cold flow, and remain completely dry underneath. Before putting items back in the cabinet, inspect the mounting nut, supply lines, sprayer hose, and shutoff valves one more time. That final check helps turn a quick DIY upgrade into a dependable installation.